Remember the photograph from the teaser?

You want to get started?!!
Here’s what you need :
- carton board (I used the leftovers from the DIY SoftBox project)
- a good pair of scisors
- one marker pen to mark the misures
- Big Ruler (40cm or more)
- Strong scotch tape
- An utility knife
- Black corrugated plastic sheeting (thats how think it is called-please inform me otherwise)
So lets do it!
1.What we’ll need to do first is to cut 4 pieces from the carton board.
- Two pieces will be the top and bottom sides of the grided softbox-size 20cm*20cm.
- Two pieces will 1cm shorter and will make the left&right sides of the the grided softbox
Here is the diagrams for the two types of panels you’ll need to the:


2.Now mark those sings on the squares you made (sorry that my look like a mess,but you’ll find your way to make the best marking for yourself):

3.Cut the 4 panels that you’ll use for the grided softbox:

4.The next step will be to cut a lot of strips from the corrugated plastic sheeting.I cut 2 pieces 20cm wide and 100cm long and cut the 20cm wide and 3cm long strips with the ruller I have:


When finished uoy’ll have a lot of those stripes,don’t worry the leftover will use as from the soon to come DIY small flash grid.
[ad#post_header]
5.Lets start glue all the strips together.I glued groups of 10-15 strips until you will have a pile 20cm hight.Let the glue dry for some minutes.


6.Go on and use the masking tape to attach 3 side of the panels together-I glued together the bottom/top panel with the two side panel.Put good quantity of glue on the panels edge and on the pile of strips and glue it all together:


Once again,allow a couple of minutes for the glue to dry.
7.Wrap it all together and you’ll get the best ever DIY softbox + grid you could imagin!


And we are done!!!
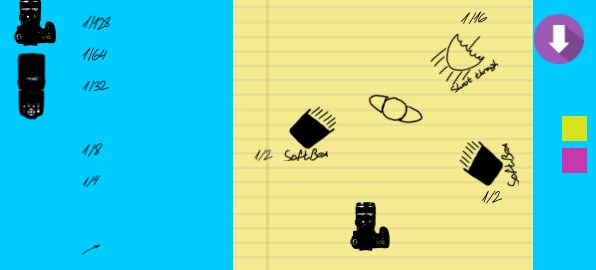
Here is a quick setup to test the DIY softbox + grid:

Do it now and let us know how you used it!

One thought on “DIY Project-20cm*20cm SoftBox+Gird for small flashes”