If you read the first post from the series about simple to do product studio photography on budget,
you could read it here:Products Photography for beginners-The most basic setup!!!(Part I).
As I said,those pictures took me just a couple of minutes to take and even thought you can see great improvement from the picture taken without the off camera flash.
But they still don’t look so good,you could see that in figure 2 there is relatively strong shadow that the camera (the product taken shot) throw on the white base.
I’ll share the easiest tip to help partly remove that shadow:
Put another board like you use as the product background on the opposite side of the main flash and it will reflect some of the flash light
(hint:in part III we will use another flash to eliminate the shadows at all)
So those are the out comes:
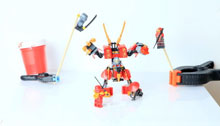
Regular on camera flash (P mode):

Off camera flash to the left (better picture,but notice the shadows on the right side of the camera):

Off camera flash to the left and white board to the right (reflects some of the light back to the posing camera):

Well this is it for this time!I’ll be happy of you share your pictures/comments here,I’ll be happy to know if that helped you!
P.S.
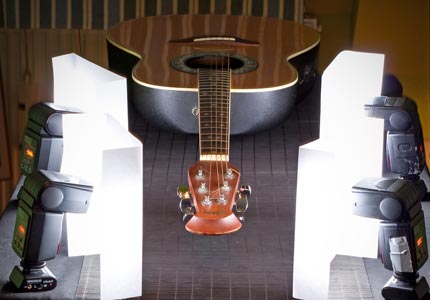
That is the setup for this tutorial,funny how simple it is…

PEACE

These pictures are overly exposed.
Hey someguy
Thanks for visiting my site.
Over exposure is an easy problem to solve.
I’ll put up a post about it in a couple of days.
I’ll try to not over expose in the next time.
PEACE